How to Disassemble a Bed Frame: Wood, Metal & Platform Beds
BED FRAME GUIDE · MOVING & REASSEMBLY
A bed frame can look simple until we need to carry it through a doorway. Long side rails, a wide headboard, and hidden connections make moving the assembled bed awkward. Taking it apart becomes much easier when we identify the joints first and keep track of how each piece fits.
Our guide explains how to disassemble a bed frame for moving or storage, including what changes for metal, wooden, upholstered, and flat-pack designs. We start with the connections, choose how much to dismantle, and organize the parts so the bed can go back together without a bag of mystery bolts.
How do you disassemble a bed frame?
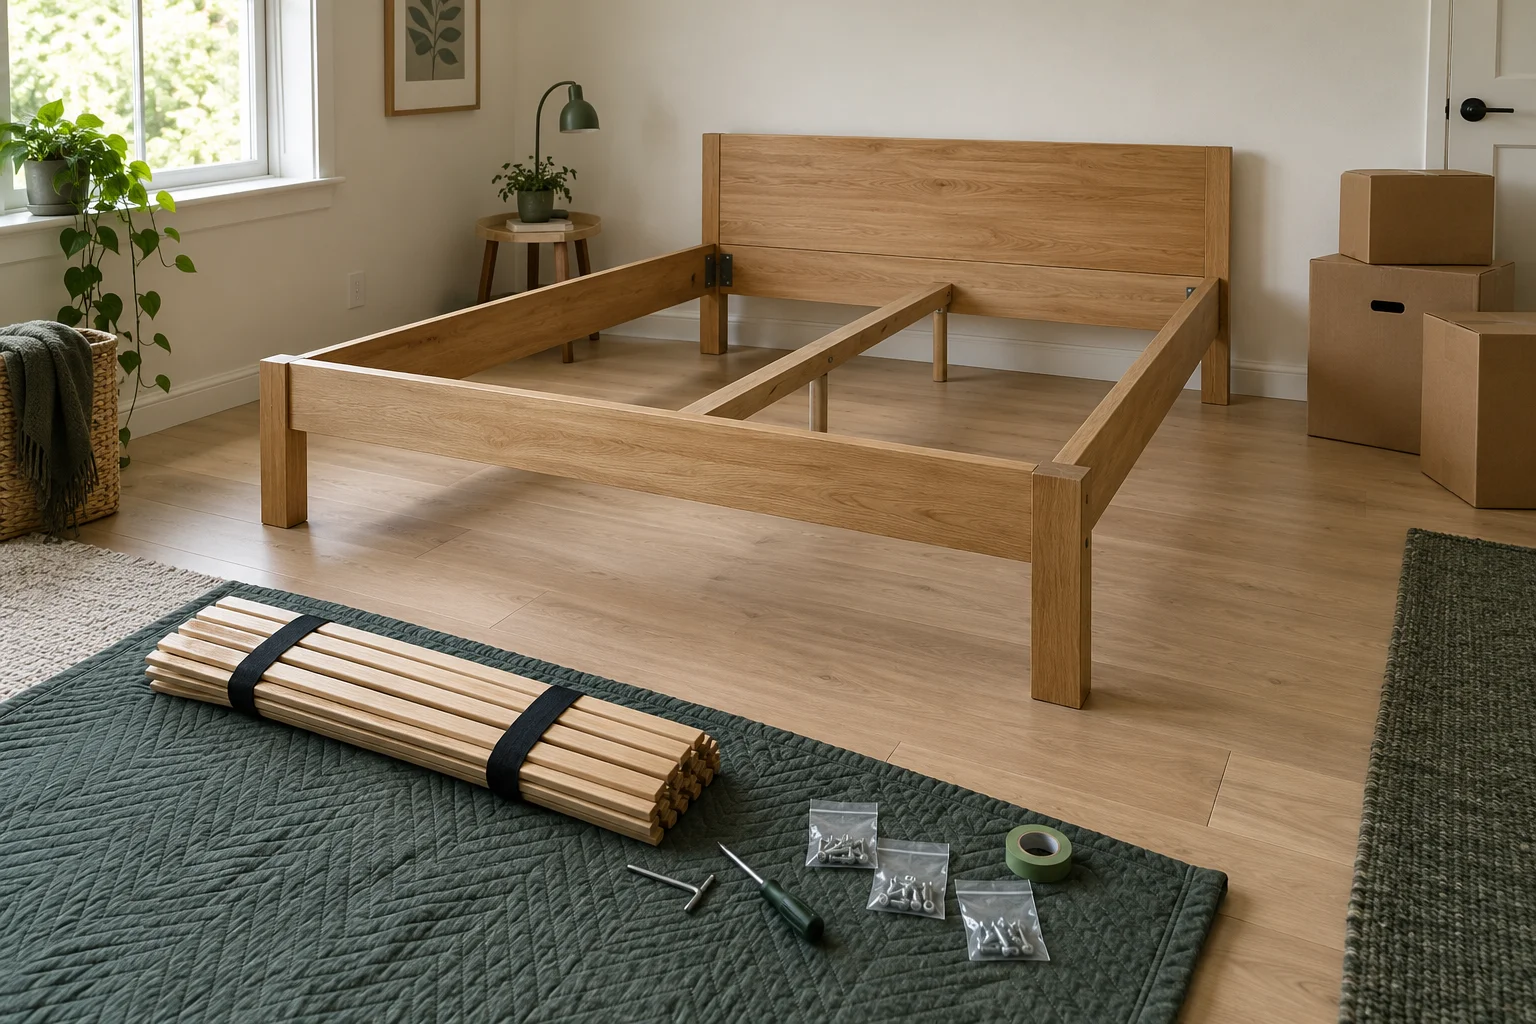
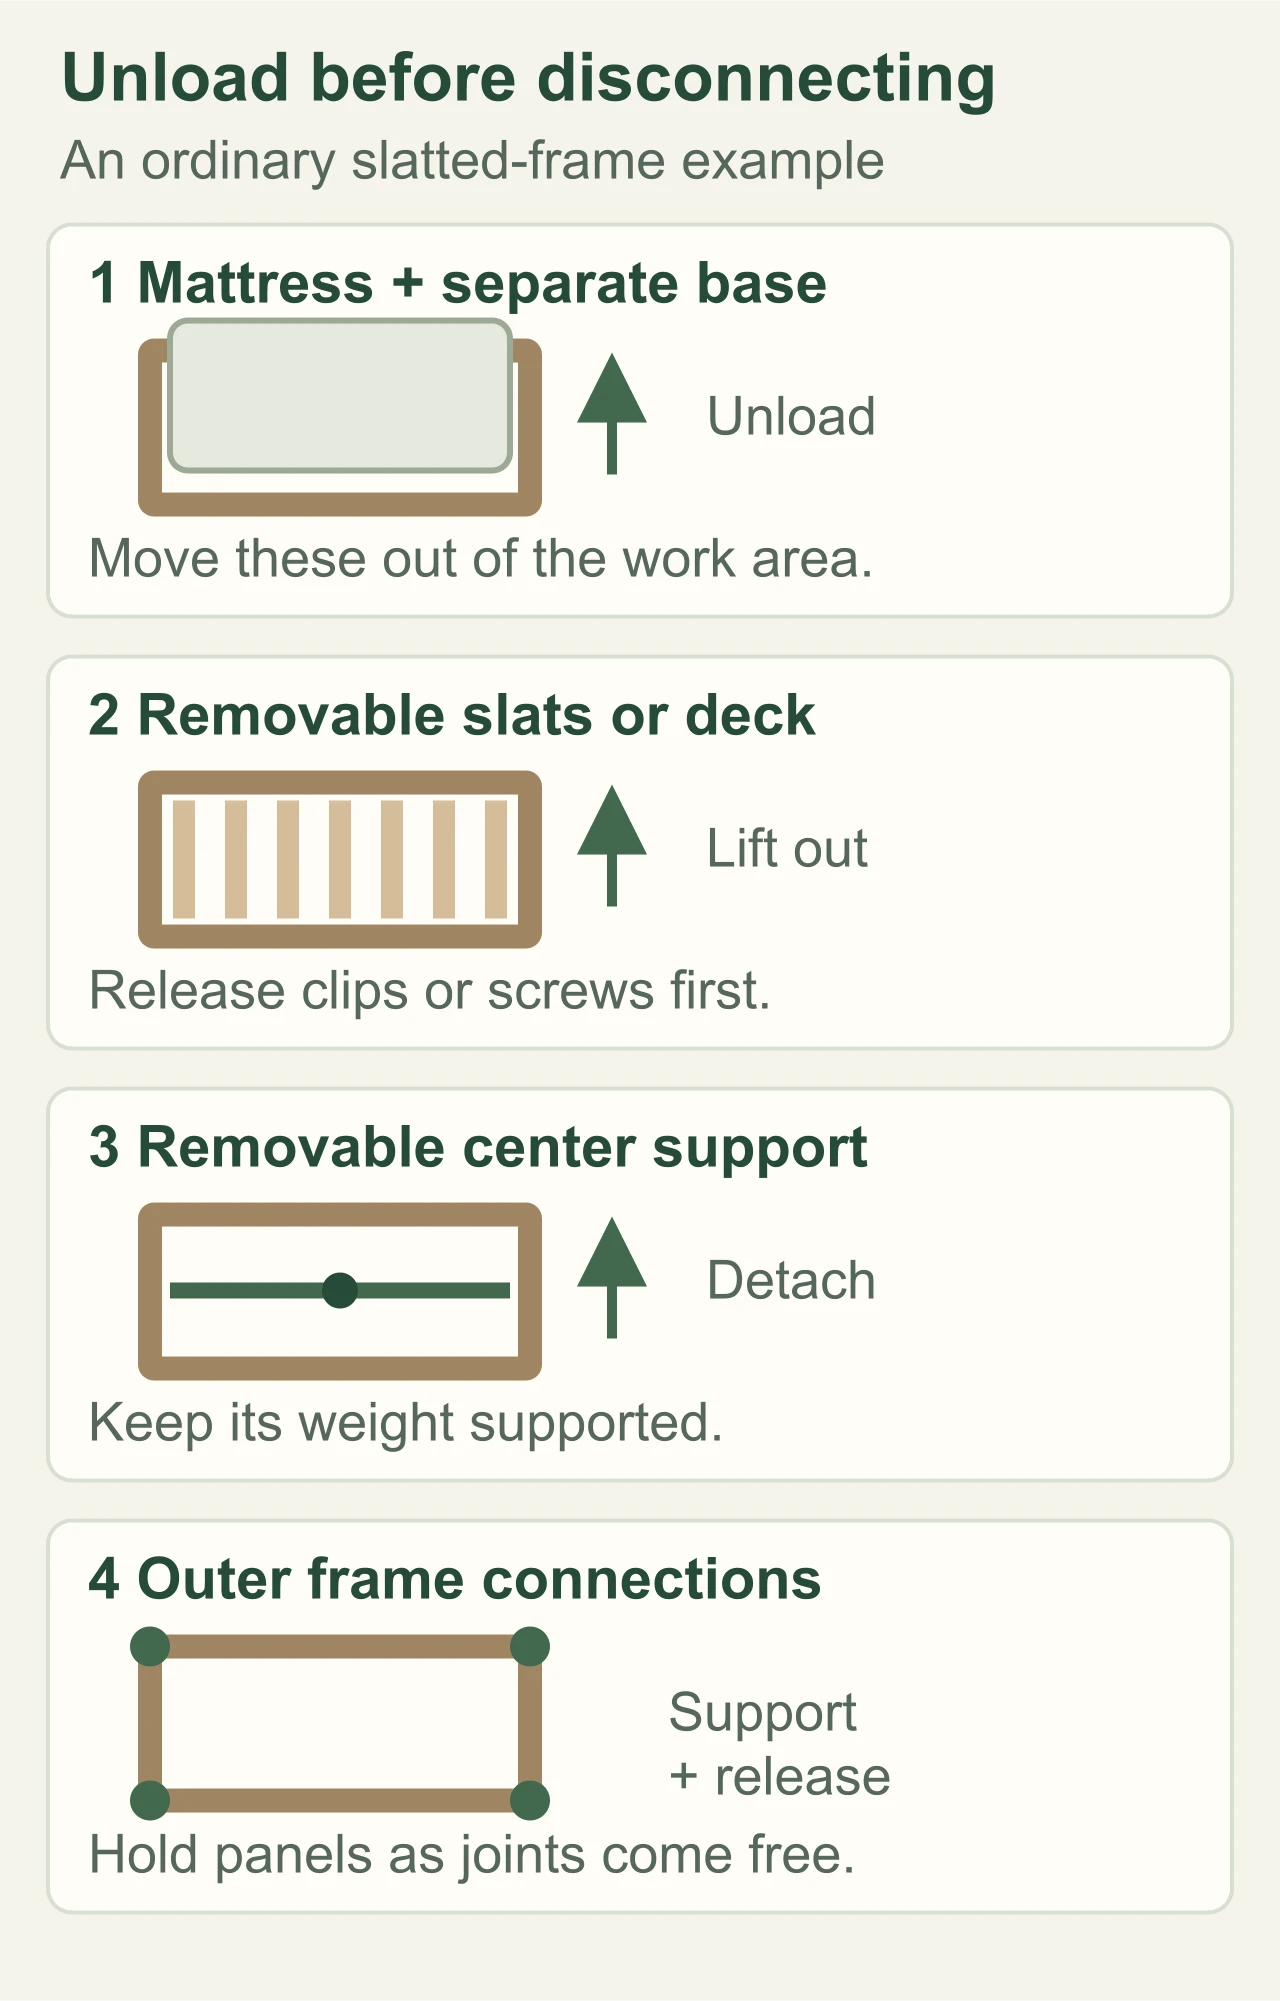
For an ordinary manual bed frame, remove the mattress and any separate foundation, take out removable slats or deck panels, then disconnect the internal supports and rail joints in the order your design allows. Support each panel before releasing its last connection. Photograph the joints and bag hardware as you work. Folding, lift-up, and powered bases have their own release or transport procedures.
Identify your bed frame connections first
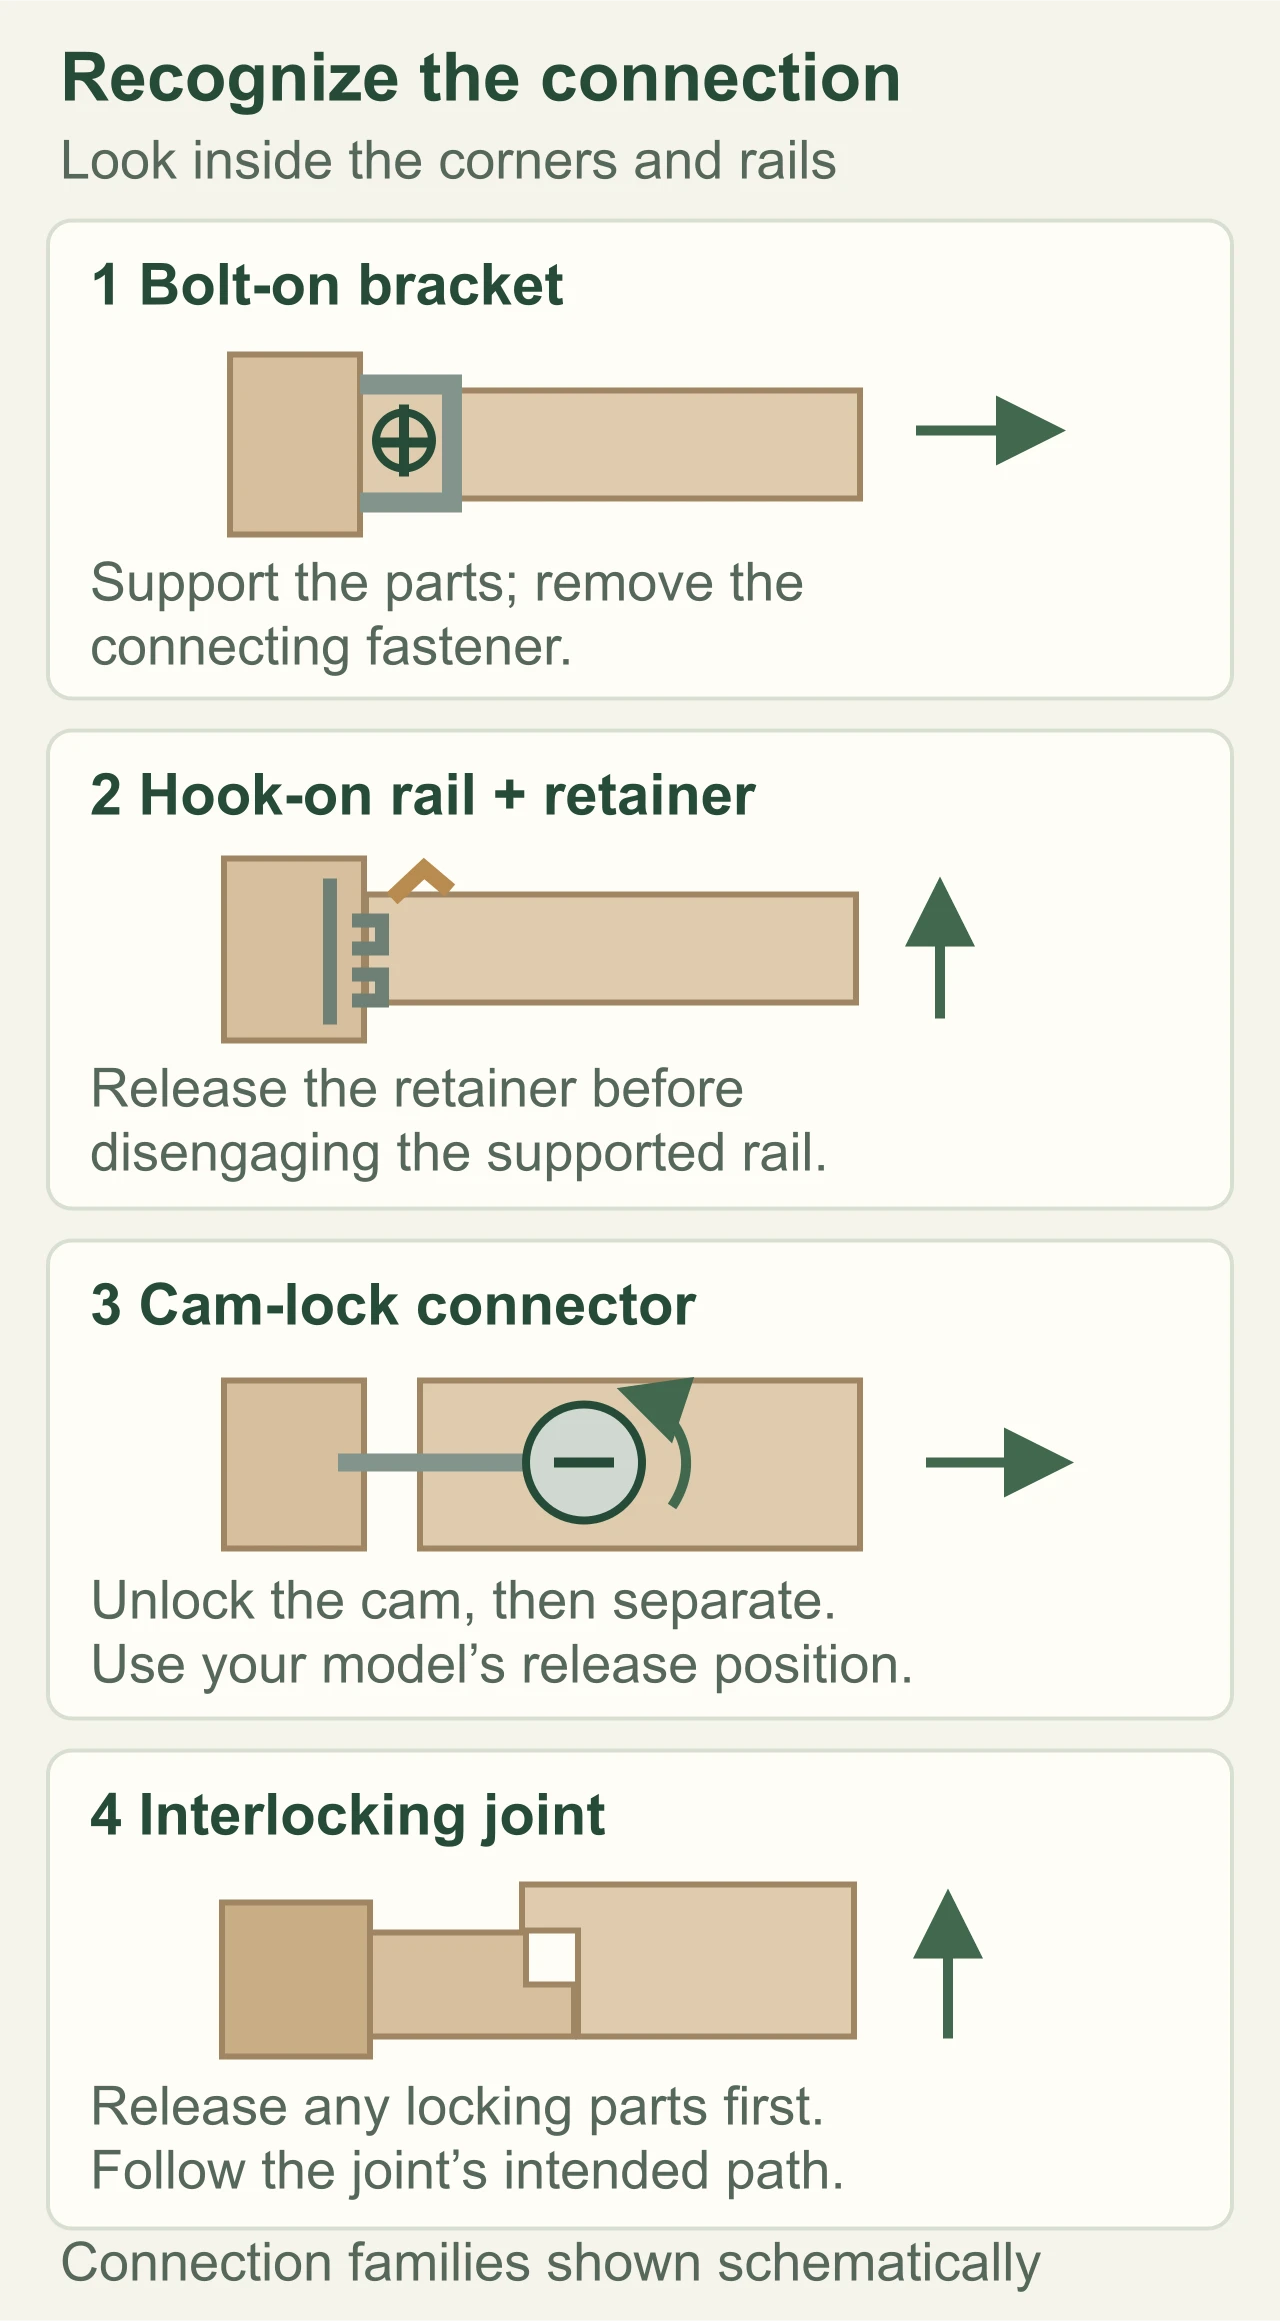
Material alone does not tell us how a bed comes apart. A wooden frame can use bolts, hook plates, cam locks, or interlocking joints. A metal frame might unbolt, unhook, or fold into sections. Inspect the inside of each corner and the center support before choosing a tool.
| What you see | Connection | What changes when taking it apart |
|---|---|---|
| Bolt heads, nuts, or bolts entering metal inserts | Bolt-on joint | Use the matching driver or wrench; hold a separate nut if it turns with the bolt. |
| Hooks seated in slots or over pins | Hook-on rail | Check for a locking tab or retaining screw, release it, then disengage the supported rail in the fitting’s direction. |
| Round fittings on the inside face of a panel | Cam-lock joint | Unlock the cam as shown in the manual before separating the panels and connector pin. |
| Overlapping wood joints or drop-in metal sections | Interlocking joint | Remove any locking screws or wedges first; release the pieces in their assembly order reversed. |
| Hinged sections with braces, knobs, or clips | Folding frame | Use its folding procedure; fixed rivets and welds stay together. |
Swipe within the table to see all three columns.
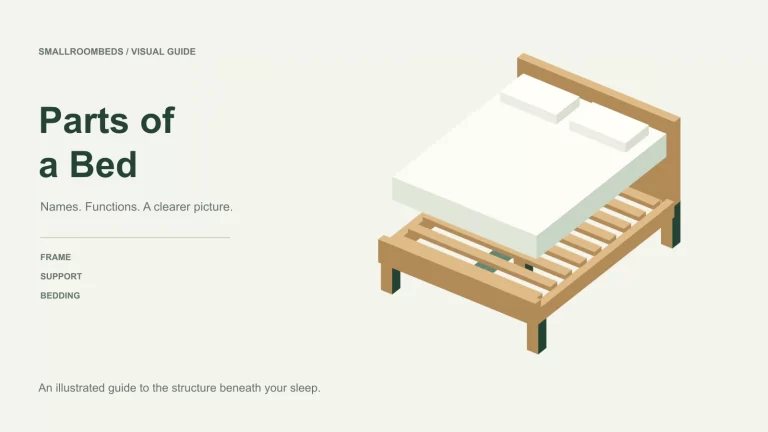
A lift-up storage platform, wall bed, bunk bed, or powered adjustable base needs its model-specific procedure. Start with the manufacturer’s instructions for those mechanisms rather than the ordinary frame sequence below. Our bed parts diagram helps identify side rails, slats, and the center beam.
Tools and supplies you actually need
We use the tools that fit the hardware already installed. Test the driver’s fit before applying force: it should seat fully without wobbling. Keep a phone, labels, and hardware bags nearby from the first connection onward.
| Item | Use | Check first |
|---|---|---|
| Hex keys or a manual screwdriver | Loosen matching bolts, screws, or cam fittings | Head shape and size; metric and inch hex keys are not interchangeable. |
| Matching wrench or socket | Turn external hex heads or hold a separate nut | Enough access to keep the tool squarely seated. |
| Zip-top bags, tape, and a marker | Group hardware by connection and label parts | Use labels on wrapping or a suitable concealed surface. |
| Moving blankets and straps | Pad panels and secure wrapped bundles | Keep adhesive tape off finished wood and upholstery. |
| Flashlight and tape measure | Find hidden fittings and check the carrying route | Measure the actual components, doorway, and turns. |
Swipe within the table to see all three columns.
A rubber mallet is an optional tool for a connection that is designed to be tapped free, after its retainer is released. It is not a substitute for finding a hidden fastener. Hand tools give us useful control around wood inserts and cam fittings; we do not need an impact driver for this job.
Use supplies you already own. If something is missing, these searches let you compare metric and inch hex key sets on Amazon or furniture moving blankets on Amazon. Choose the tool sizes and padding your frame needs.
How to disassemble a bed frame in 7 steps
The following sequence suits common manual panel and platform frames. Treat the original assembly drawing as the map: removable mattress supports usually come out before the outer frame, while integrated or permanently attached parts stay with their subassembly.
STEP 1
Find the model, photograph the joints, and plan the route
Look for a model label, purchase record, or assembly booklet. Photograph the whole frame, each inside corner, the center support, and any adjustable-height mounting holes. Mark the head and foot ends and label the rails left and right as viewed from the foot of the bed.
Measure the largest panel and the route out of the room, including turns and stair landings. Decide which subassemblies can remain intact. Clear a padded place for removed panels and arrange help to hold bulky pieces before their connections are released.
STEP 2
Remove the bedding, mattress, and separate foundation
Strip the bed and move the mattress to a clean place outside the working route. Remove a separate box spring, foundation, or bunkie board next. For a split foundation, label the sections and their orientation if the setup requires it.
This exposes the supporting structure without mattress weight pressing on its joints. Keep the base’s own cover and framework intact unless its instructions describe a knock-down design. Removing a foundation from the frame is a separate task from dismantling the foundation itself.
STEP 3
Lift out or unfasten the removable slats and deck panels
Check whether the slats lift out, roll together, clip into holders, or screw to the frame. Release their actual fasteners before lifting. Number nonidentical slats or panels and preserve their head-to-foot orientation.
Roll linked slats together without pulling off the fabric straps. Keep removable end caps with their slats; leave fixed holders on the rail when they do not need to come off. A framed slat unit may lift out as one piece rather than needing every slat removed.
STEP 4
Disconnect removable center supports
With the removable support surface unloaded and clear, inspect how the center beam attaches. It may rest in brackets, bolt to the ends, or form part of a larger subframe. Support the beam as its connections come free.
Keep the beam and its legs together if that assembly fits the route. If legs must come off, record their positions and any leveler settings. Do not remove a support leg while another component still relies on it. Integrated crossbars or welded sections remain together.
STEP 5
Support the panels and release the rail connections
Have a helper hold the headboard or footboard and support the rail being detached. For a bolt-on corner, loosen the connecting hardware with the correct tool, keep the pieces supported, and remove the fasteners needed to separate that joint.
For hook-on fittings, check for a safety tab or retaining screw before lifting the rail out of its seated position. For cam locks, turn the fitting to its release position as the manual shows, then separate the panels without levering against their edges. Bag each connection’s hardware immediately.
Work through the remaining corners while controlling the loose pieces. There is no universal rule that the headboard must come off first. A decorative headboard attached to a freestanding platform differs from one that forms the frame’s structural end.
STEP 6
Remove only the remaining parts needed for transport
Remove detachable legs, headboard brackets, or other accessories only where needed for carrying and packing. Keep fixed mounting plates, threaded inserts, glued joints, and riveted components in place. Taking every visible screw out can create extra work without making the frame easier to move.
Check for a remaining hidden connection if two parts resist separation. On an upholstered frame, look for the designed access flap or opening rather than stripping off the fabric.
STEP 7
Check the hardware, label the bundles, and add padding
Match each hardware bag to its photograph and labeled joint. Keep washers and spacers with their bolts, and include the correct hex key if useful. Check the floor and wrapping before moving the last large piece.
Wrap panels separately, cushion rail ends, and bundle slats so they cannot slide loose. Secure hardware bags to the protective wrapping or put them together in one clearly labeled container. Tape should hold the wrapping, not stick directly to the furniture finish.
What changes for different bed frame types?
Metal frames: distinguish folding sections from bolt-on platforms
A basic rail frame may have adjustable cross arms and keyhole connections; a metal platform may have many bolted bars. Photograph the width setting and release only the specified connections. With a folding frame, remove the mattress and use its knobs, clips, or braces to fold the intended sections. Do not drill out hinge rivets to make it smaller. Our folding Queen bed frame guide explains how folding construction changes storage and moving.
Wooden and joinery frames: preserve the fitted joints
Identify whether the corner uses a metal insert, a cam, hooks, or wood joinery. After unlocking it, separate pieces along their intended direction rather than twisting a dowel joint sideways. Leave permanently fixed cleats and inserts attached.
Tool-free does not mean hardware-free. For example, the Thuma Classic Bed instructions use two hand-tightened screws to secure the center rail. Those locks need to be released before the interlocking frame comes apart. Different joinery bed frames use different locking arrangements.
IKEA and flat-pack beds: use the exact model’s drawing
Find the size and version in IKEA’s assembly documents. Similar-looking beds can have different cams, brackets, and support rails. A slat ledge may obstruct a fitting and need to move first; elsewhere it can remain attached. Unlock cams rather than repeatedly unscrewing their mating pins, unless the instructions call for pin removal. Do not assume one wrench size or a fixed half-turn releases every cam.
Upholstered and drawer beds: remove accessible components
Empty storage first. Remove detachable drawers using their specified stops or slide releases, and label left and right components. Drawers do not need to be dismantled simply because the frame is coming apart. Keep upholstery and fixed drawer slides attached when the resulting pieces can be transported intact.
Lift-up storage beds and powered adjustable bases
A gas-lift platform is different from loose slats or drawers. Its hinged deck and struts need the exact model’s support and dismantling procedure; do not treat strut fittings as ordinary corner bolts or use tape as a structural restraint.
For a powered base, follow its transport instructions. On the Ergomotion RIO 3.0, that starts with returning the base to flat, letting the motors stop, then unplugging it. Remove only the transport components the manual identifies; motors and actuators are not routine moving-day disassembly parts. If the base will not flatten, start with our adjustable bed troubleshooting guide. Wall beds and bunk or loft beds likewise need their own sequence for anchors, upper sections, and mechanisms.
What to do when a bolt or joint will not release
We first identify what is resisting: the fastener, the load on the joint, or a lock that is still engaged. More turning force does not solve all three.
| What happens | Check first | Next action |
|---|---|---|
| Driver slips in the head | Wrong size, wrong head type, or a worn recess | Stop slipping; seat the correct tool fully. Damaged hardware may need a suitable extraction method and replacement. |
| Bolt turns but does not withdraw | A separate nut turning behind the bracket | Hold the matching nut with a wrench while turning the bolt. |
| A wood insert turns with the bolt | The insert moving in the panel | Keep the joint supported and arrange the appropriate insert or panel repair before reusing it. |
| Hooked rail will not lift free | Retainer, rail load, or an incorrect release direction | Support the pieces, release the retainer, and follow the fitting’s movement; do not pry sideways. |
| Panels remain joined after loosening | Another cam, bolt, bracket, or fitted dowel | Check the drawing and opposite face before pulling or tapping. |
Swipe within the table to see the checks and next actions.
For rusted metal hardware, a suitable penetrating product may help where the hardware maker permits it. Keep it off upholstery and finished wood, and follow the product’s directions. Lubrication does not release a mechanical safety catch or fix a rounded bolt head.
Pack the parts for easier reassembly
We keep a simple hardware map: bed name, joint label, and matching photo. Use four corner labels, such as HL for head-left and FR for foot-right, plus a separate center-support bag. The letters matter less than using the same orientation on every label.
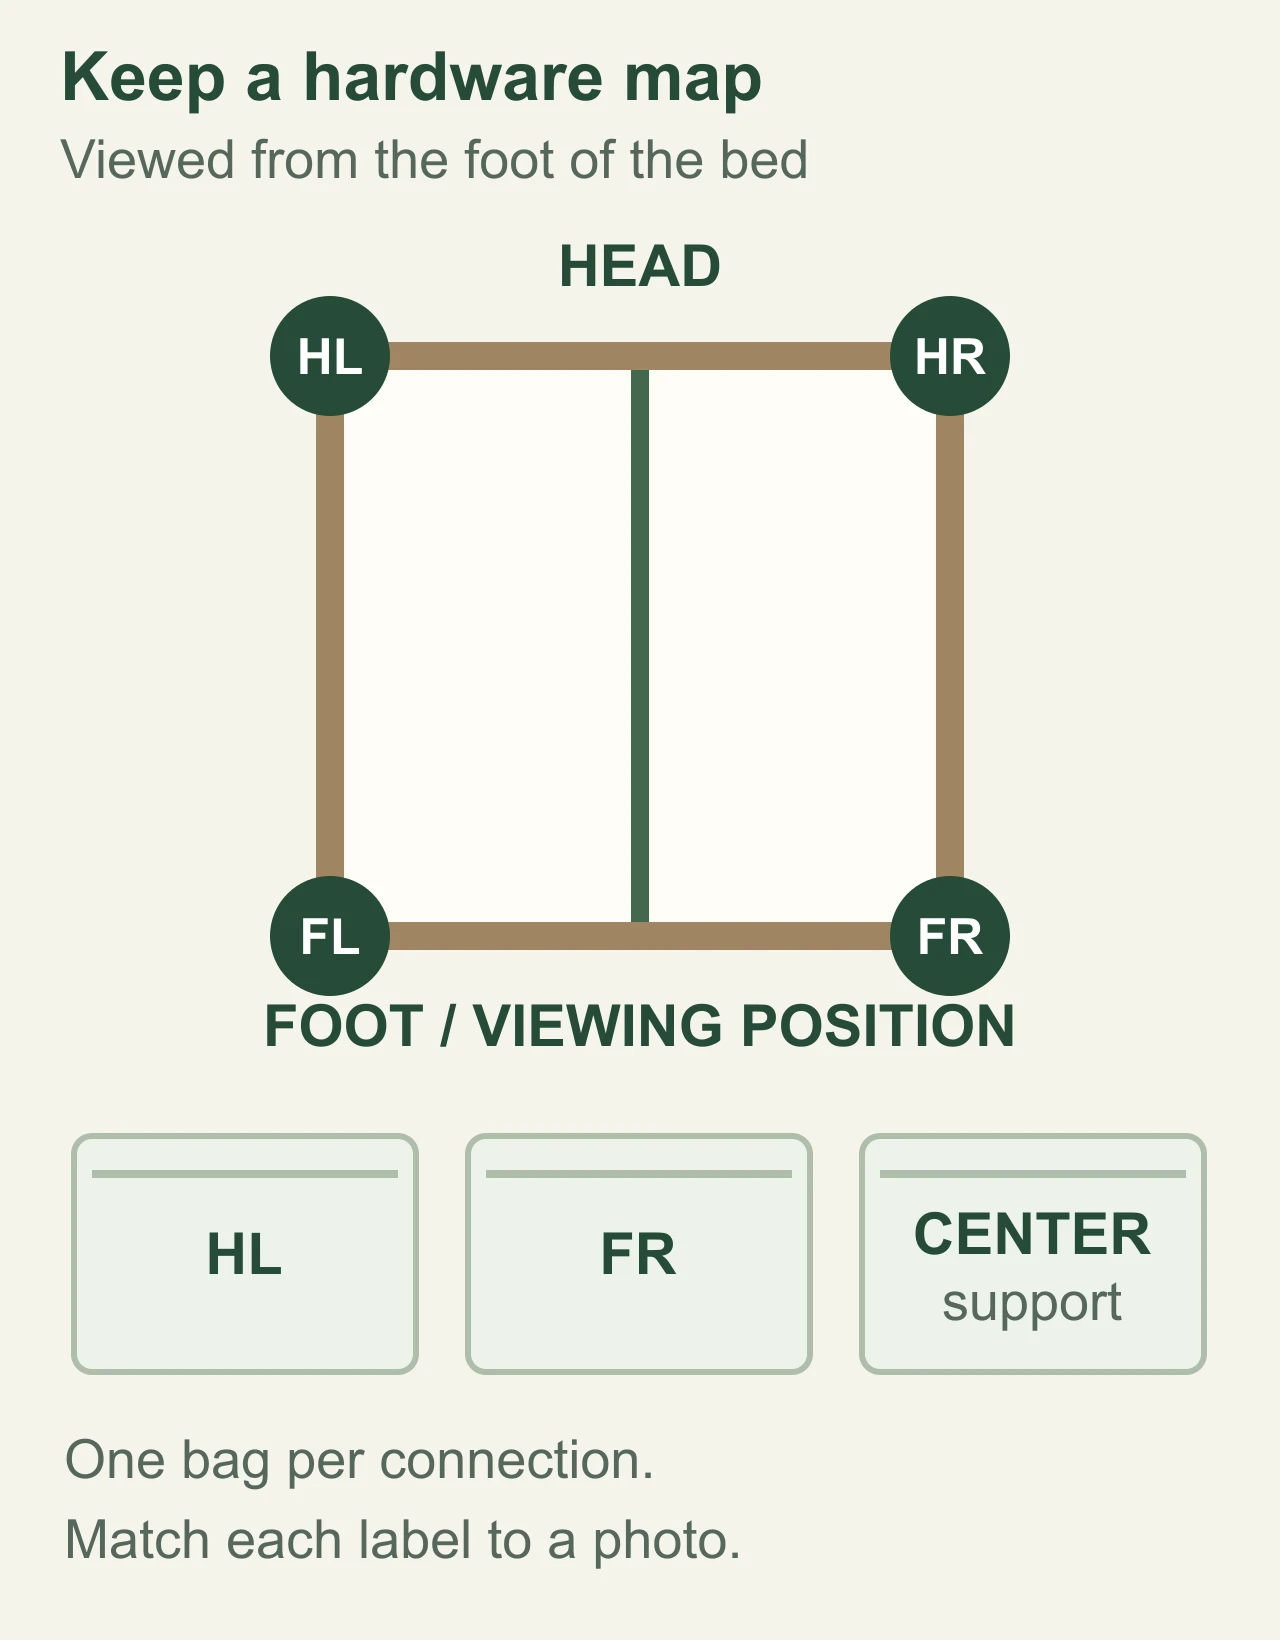
Pad broad panels and keep them supported during transport. Bundle matching rails with padding between finished faces. Keep all labeled hardware accessible rather than at the bottom of a general moving box.
At the destination, lay out the parts in the bedroom and use the assembly manual and photos to restore the frame. Start threaded connections by hand, align the structure, and tighten in the specified order. Refit every required beam, leg, retainer, and slat holder before adding the mattress. If the setup uses a separate foundation, our box spring installation guide covers its seating and support checks.
Bed frame disassembly FAQs
How do you take apart a bed frame with no visible screws?
Look for hooks, locking tabs, drop-in joints, concealed cams, or hand-tightened fittings. Find the model’s drawing and release the lock before separating the supported pieces. No visible screws does not mean the joints can simply be pulled apart.
What if you lost the original Allen key?
Match a replacement to the bolt’s internal hex recess. Use the correct metric or inch size and seat it fully. A close but loose fit can damage the head. A manufacturer’s hardware list or replacement-tool service can identify the size when it is unclear.
Do you have to disassemble the whole frame to move it?
Only dismantle as far as the design and moving route require. A folding base or manageable subassembly may travel intact. Measure actual pieces and turns, and follow any transport instructions rather than relying on the mattress size name.
How long does bed frame disassembly take?
The connection count, frame design, access, and stuck hardware determine the time. A folding rail frame can be much quicker than a drawer bed or large panel frame. Leave time for photos, labeling, and wrapping instead of treating the time spent turning bolts as the whole job.
Can you replace a missing bolt with one from a hardware store?
It must match the specified diameter, thread pitch, length, head, and any required grade or shoulder. Match the model’s part number through the manufacturer where possible. The same-looking head or the same bed size does not establish compatibility.
Why does the frame wobble after reassembly?
Check the correct hardware locations, fully engaged joints, required center supports, leveler contact, and damaged fittings. Align and tighten according to the assembly instructions. Do not compensate for a missing component by overtightening another connection.
Our approach is to identify the connection, unload the supports, control each loose piece, and keep its hardware labeled. That makes the dismantled frame easier to carry and gives us a clear route back to a properly assembled bed.